 Capturing a great image first time, every time is a very fine art – lots of environmental factors such as lighting can really negatively impact the final image that is captured. The great news is that if you don’t capture the image you want, you can easily edit the image after.
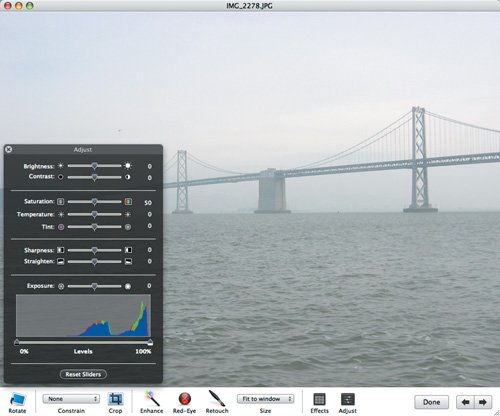
The Curves tool works by making subtle changes to the shadows, highlights and midtones (the blacks, whites and greys of an image) – it’s not a tool to edit colour or remove noise. It’s most effective with images that are over-exposed (too light) or under-exposed (too dark) but can also work well with images that are a little bit lacklustre in their colouring. Follow our handy nine-step tutorial to discover how to completely transform your images using Aperture.
Step-by-step Get to grips with Curves
1. Get started
Launch the Aperture app and navigate to an image that you wish to edit. Double-click on an image to open it full screen. Alternatively, click on the Viewer icon in the top-right corner.
2. Launch the Inspector
Next, click on the Inspector icon in the top-left of the Aperture interface. In the column that appears on the left-hand side of the interface, click on the tab labelled Adjustments.
3. Launch Curves tool
Click on Add Adjustment. From the drop-down that appears, select Curves. The Curves tool will be displayed in the main left-hand column. Ensure that the box labelled Curves is checked.
4. Auto adjust image
In the Curves toolbox, click on both buttons labelled Auto. This will automatically apply the Curves tool to your image – it saves time and also gives you a much better work canvas.
5. Select Colour Channel
The Auto tools will have already improved your image, yet there is always more to be done. Click on the menu next to the Channel option and make sure that RGB is selected.
6. Into the shadows
Drag the black slider on the left-hand side of the Curve grid to increase the number of shadows – this will increase colours and works particularly well with over-exposed images.
7. Add some light
Drag the white slider at the bottom of the righthand side of the grid to increase the number of highlights and improve the colour intensity – this works wonders with under-exposed images.
8. Create a Curve
On the Curve grid, you’ll notice a number of dots. Click on these dots and drag them around the grid to create a curve – the image will change in real-time as you’re moving the dots.
9. Go slow
It’s important to note that a lot of these changes will be subtle, so move the dots around slowly – dragging them from one end of the grid to the other will result in extreme changes.